
Photography isn’t just about pressing a button. It’s about turning moments into stories, using light, gear, and creativity to make images that stand out. Many photographers struggle when inspiration runs dry, and that’s where photeeq photo ideas come in. Whether you’re a beginner just starting or an experienced creator looking for fresh concepts, this guide will show you how to plan, shoot, and edit images that people remember.
What Are Photeeq Photo Ideas?
At its core, photeeq photo ideas refer to creative photography concepts, tutorials, and resources designed to spark inspiration. Instead of repeating the same old poses or flat compositions, these ideas push you to explore lighting, props, composition, and storytelling. Photeeq as a platform provides classes, reviews, and tutorials but the real magic happens when you apply those concepts in your own way.
Think of these ideas as a toolkit. Some will help you master basics like aperture and shutter speed. Others will challenge you to experiment with neon lights, puddle reflections, or even backlit rain portraits. Together, they form a roadmap for building a portfolio that feels original, professional, and expressive.
Beginner vs Advanced: Choose Your Path
Not all photoshoot concepts work for everyone. Beginners often benefit from simple setups, while advanced photographers crave technical challenges.
-
Beginner-friendly ideas:
-
Golden hour portraits
-
Indoor shoots with window light
-
Still life with props and natural backgrounds
-
Reflection shots with mirrors or water
-
-
Advanced ideas:
-
Motion blur in busy city streets
-
Double exposure effects
-
Neon-lit cinematic portraits
-
Blacklight body paint photography
-
By dividing inspiration into beginner and advanced levels, you’ll always know where to start and where to push your skills next.
Indoor vs Outdoor: Lighting That Always Works
Lighting makes or breaks a photo. Indoors, you’re often fighting against low light or cluttered backgrounds. Outdoors, you deal with harsh sun or unpredictable weather. Here’s how to handle both:
Indoor Lighting
-
Use window light for soft, natural illumination.
-
Add a reflector to bounce light and reduce shadows.
-
Experiment with practical lights (lamps, fairy lights) for mood.
Outdoor Lighting
-
Shoot at golden hour for warm tones.
-
Try backlighting during sunset for silhouettes.
-
Use a speedlight with gels to add creative colors.
Understanding light gives you control, no matter the setting.
Gear & Settings Cheat Sheet
Here’s a quick reference you can use on any shoot:
-
Aperture (f-stop):
-
f/1.8–f/2.8 for blurred backgrounds
-
f/8–f/11 for landscapes and group shots
-
-
Shutter Speed:
-
1/50–1/125 for portraits
-
1/1000+ for freezing motion
-
Slower than 1/30 for motion blur or light trails
-
-
ISO:
-
100–400 in daylight
-
800–1600 indoors without flash
-
Higher if needed, but watch for grain
-
-
Lenses:
-
50mm/85mm for portraits
-
Wide-angle for landscapes or architecture
-
Macro lens for close-ups
-
This cheat sheet ensures you always start with the right exposure triangle.
Creative Concepts That Pop (With Examples)
Some concepts never fail to impress:
-
Zombie portraits with Photoshop. Use Liquify and texture overlays to create eerie transformations.
-
Reflections in puddles. After rain, crouch low to capture mirrored cityscapes or skies.
-
Neon at night. Capture cinematic looks using street lights and color gels.
-
Vintage cowgirl theme. Add costumes and props for playful, styled shoots.
-
Blacklight body paint. Neon colors glow under UV light for dramatic portraits.
Each of these concepts works because it combines creativity with technique.
Budget Constraints: Great Results With Minimal Gear
You don’t need expensive cameras to create stunning photos. Some low-cost tricks include:
-
Use aluminum foil as a DIY reflector.
-
Replace softboxes with white sheets to diffuse light.
-
Shoot with your smartphone + tripod when a DSLR isn’t available.
-
Add creativity with household props like mirrors, books, or fairy lights.
Constraints often push you to think outside the box and that’s when the best photeeq photo ideas happen.
Small Spaces & No Model? Solo & Object Shoots
If you don’t have a model or a big studio, try these ideas:
-
Flat lays with books, gadgets, or food.
-
Self-portraits using a tripod and timer.
-
Plant portraits a big leafy plant adds depth and texture.
-
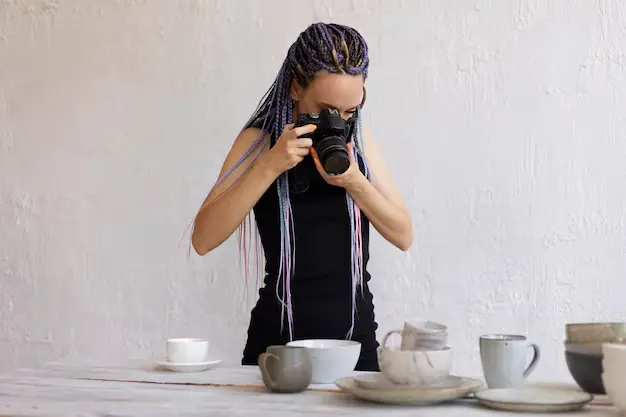
Object stories create a narrative with shoes, coffee cups, or vintage items.
Creativity thrives even in small apartments or backyards.
Shot List + Mood Board Template
Every professional shoot starts with a plan. A shot list ensures you capture every angle, while a mood board keeps your style consistent.
-
Shot List Basics: wide shot, medium, close-up, creative angle.
-
Mood Board Elements: color palette, props, wardrobe, example photos.
-
Tools like Canva or Pinterest make this easy.
With this workflow, you’ll spend less time guessing and more time shooting.
Editing Workflow: From RAW to Wow
Post-processing brings your images to life.
-
Lightroom workflow:
-
Adjust exposure, contrast, and white balance.
-
Fine-tune colors with HSL sliders.
-
Apply subtle vignettes for focus.
-
-
Photoshop workflow:
-
Retouch blemishes.
-
Use dodge & burn for depth.
-
Add creative overlays or double exposures.
-
Editing isn’t about fixing mistakes it’s about amplifying your creative vision.
Color Theory & Styling: Props, Wardrobe, Backgrounds
Great photography isn’t just technical it’s also artistic.
-
Props: Balloons, flowers, books, or even food.
-
Wardrobe: Choose colors that contrast with the background.
-
Backgrounds: Keep them simple so the subject pops.
-
Color theory: Use complementary colors (blue + orange, red + green) for visual impact.
Color guides emotion, and emotion creates connection.
Location Scouting, Permits & Safety
Before shooting outdoors, plan your location:
-
Scout for natural light and textures.
-
Check whether you need a permit (parks, rooftops, historic sites).
-
Always prioritize safety don’t climb unstable structures or block traffic.
The right location can transform an ordinary concept into an unforgettable shot.
Legal Basics: Model Release, Copyright & Usage
Professional photographers protect themselves legally:
-
Always get a model release if you plan to sell or publish photos.
-
Respect copyright laws don’t use locations, murals, or props without permission.
-
Understand licensing terms if clients ask for commercial use.
This builds trust and prevents future disputes.
Portfolio & Monetization: Present, Pitch, Profit
Turning photeeq photo ideas into income requires strategy:
-
Build a portfolio site with categories (portraits, lifestyle, events).
-
Share work on social platforms like Instagram and Pinterest.
-
Pitch to brands or clients with customized proposals.
-
Explore stock photography as passive income.
Creativity pays if you package and present it well.
Common Mistakes & Quick Fixes
Avoid these pitfalls:
-
Over-editing. Keep skin tones natural.
-
Ignoring composition. Use rule of thirds and leading lines.
-
Bad lighting. Learn how to control shadows.
-
Cluttered backgrounds. Simplify the frame.
Small adjustments often make the biggest difference.
FAQs on Photeeq Photo Ideas
1. What is Photeeq used for?
Photeeq is a platform that provides tutorials, classes, product reviews, and creative photography inspiration.
2. Can beginners use photeeq photo ideas?
Yes. Many concepts, like reflections or golden hour portraits, are beginner-friendly.
3. Do I need expensive gear?
No. Even smartphones can create great results with good lighting and composition.
4. How do I find unique locations?
Look for rooftops, abandoned buildings, or natural landscapes. Always prioritize safety.
5. What editing tools work best?
Lightroom for global adjustments, Photoshop for creative effects and retouching.
Final Thoughts
Photography thrives on inspiration. With these photeeq photo ideas, you’ll never run out of ways to push your creativity. From simple window-lit portraits to advanced neon shoots, the possibilities are endless.
Stay curious, keep experimenting, and remember every click is a chance to tell a story.